I love Valentines day and am glad I was able to sneak in one more Valentine project. The flowers in this frame are made from ric rac and are super easy to make and I am going to show you how I made them.
Showing posts with label valentines. Show all posts
Tuesday, February 14, 2012
Ric Rac Valentine
Happy Valentines Day!!!!
I love Valentines day and am glad I was able to sneak in one more Valentine project. The flowers in this frame are made from ric rac and are super easy to make and I am going to show you how I made them.
I took my ric rac, cut it in half and then weaved it. I used medium sized ric rac.
I then cut it in half again. At the end I started rolling the ric rac.
Once I finished rolling I used hot glue to secure the other end to the bottom of the rose.
The front of the rose will look like this. Take your fingers and push the ric rac to the outside of the rose, opening the petals.
This is what your rose will look like once it has been pushed open.
I then took a frame I had on hand and put white card stock in it and then drew a heart to follow when gluing on my roses.
I have made rings, hair clips, and bobby pins using this technique. It was fun to make something for my home for Valentines day.
Thanks for stopping by. Have a great day!

I love Valentines day and am glad I was able to sneak in one more Valentine project. The flowers in this frame are made from ric rac and are super easy to make and I am going to show you how I made them.
Friday, February 10, 2012
Valentine Pocket Banner Gift
I made this pocket banner as part of my hubby's Valentine gift.
I will be filling each little pocket full of goodies.
I started with 6 pieces of double sided pattern paper. I cut each to an 8" square.
I then took my scalloped scissors and cut on two of the sides. The third side I used a smaller scallop.
I then folded over the side that didn't have the decoritve edge and folded over as shown.
I then took the other side and folded it over. I pressed it down and then glued it with hot glue. If you want a cone shape look then don't press down. I wanted mine to be more of a pocket than a cone.
For the flower, I cut a 1" x 12" piece of my scrap paper.
I then folded my paper like an accordian.
I then took the two ends and glued them together with hot glue.
I then roughly cut a circle and glued the flower to it. You will have to push the flower down onto the circle.
This is what it will look like after the flower is glued to the circle.
I then took a bead and glued it to the center of the flower.
I then took some yarn I had on hand and wrapped around my pocket and then glued my flower to the pocket. If you don't want a banner you could just add ribbon to the one pocket and have a cute gift to give someone.
I took some ribbon and glued each pocket to my ribbon with hot glue.


I will be filling it full of Valentines stuff for my sweatheart. I will have some treats in some of the pockets and activities that I have planned for Valentines. (Like where we will go for dinner, we are going to a movie, so I will pre-purchase the tickets and have them in the pocket and some other fun Valentine things, if you know what I mean.)

Linking to: Every Creative Endeavor, I heart naptime, Craft-o-Mania, Michelle Paige
Thursday, February 9, 2012
Conversation Hearts Burlap Style
Just a few more days until Valentines day, and I am still adding more love decor to my home. This next project was way easy and I love the results. Conversation Hearts Burlap Style!
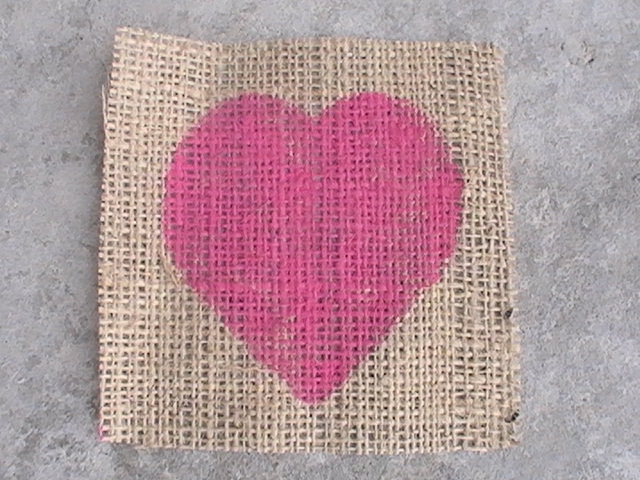
When I made the dinosaur plaques for my little boys room and knew I wanted something done the same way. That's how these were born. I started by cutting 3- 4 1/2" square pieces of burlap. I took a piece of card stock and made my heart stencil. I placed the stencil on my burlap, (make sure to put something underneath your burlap, paint will come through).
Here's what it will look like after painting.
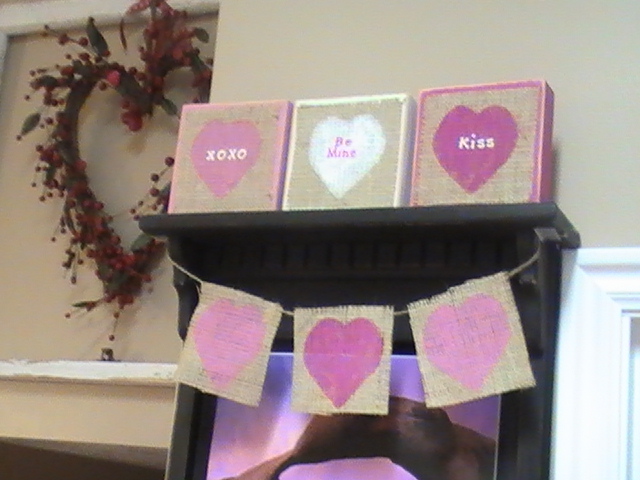
I then grabbed some stickers and put different sayings on each heart.

I then cut out my wood, just slightly larger than my burlap piece. I sanded it and then painted the blocks. I then glued my burlap to the wood piece and then sanded the edges.
Here they are on my little shelf in my kitchen.


I had so much fun stenciling the burlap, that I decided to make three more and make a little banner to go under the blocks.
How is your Valentine decorating going? Are you done or are you still adding last minute touches like I am? I just can't help myself, I have a few more ideas I still want to make before Valentines day.

Linking to: Lil Luna, Oopsey Daisy, Someday Crafts, Every Creative Endeavor, I heart naptime , Craft-O-Maniac, Michelle Paige
Thursday, February 2, 2012
Valentine Garland
I have been wanting a Valentine garland for my hutch. I wanted something simple so this is what I came up with.

I bought three sets of doilies from the dollar store.

I cut the center out on a few of the hearts.
Using embroidery thread I threaded it through the holes of each doily.
I strung it onto my hutch. I love the simplicity of this project.


I bought three sets of doilies from the dollar store.
I cut the center out on a few of the hearts.
Subscribe to:
Posts (Atom)