Wow, it's been awhile since I have done any kind of crafting project of my own. Between summer and getting my kids ready for fair and going back to school, I haven't had much time. I have one kid that is back in school, the other one starts in a week and then I will just have one at home, my little one still takes naps, so that's going to give me some CRAFTING TIME!!!
A craft that I have been wanting to do for a long time is to make a menu board. I think they are so fun and it's going to help so much, it's going to help me be more organized and it will help the evenings go more smooth with different schedules, homework, after school activities, etc. I don't know about you, but I hate thinking of what's for dinner every night, it seems to take so much time when trying to come up with the idea, rather than knowing and planning and making. I haven't made my menu board, because I wasn't sure how I wanted to do it. While I was in Idaho this summer I saw
Cherie's Family Home Evening Chart made from an old window and loved how she did it. That gave me the inspiration to make my menu board from an old window (which I still have two more laying around waiting to be re-done and hung on a wall - I have the ideas, so they will be getting done soon). I still wasn't sure how I wanted the rest of the window to look like, I knew what I wanted as far as the functionality, but not sure about the design, so I just decided to take the plunged and see where it went. Love how it turned out and am super excited to put it to use.

I started out with this old window.
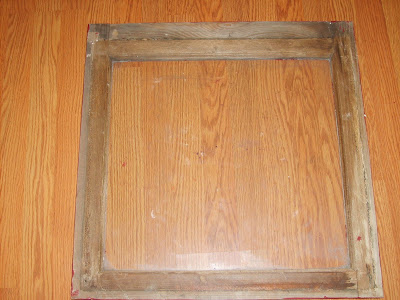
Taped and painted it. Kelsey was pretty excited that it was a dry erase board. Like the cute message?

I loved how Cherie did her window. Instead of using vinyl she wrote on the back of the window, which is brilliant. Using the window as a dry erase board the vinyl would collect all of the yuck that comes with dry erase boards. Now each week when I change the board, I can spray the whole front of the window and it will clean up nicely. I typed and printed the words the way I wanted them to look and then taped them to the front of the window and then turned my window around and traced the words with a permanent marker.

Once I was done tracing, I took the paper off, and now I have my cute words.

I then added these metal letters for my "menu" - I had those on hand, but anything else would work, vinyl lettering or paper.

I then added this cute wood flower that I found at a local craft store that was on clearance - love that!

I then typed (actually Kelsey did the typing) out menu ideas for breakfast, lunch and dinner. I then glued them to red and back card stock. With the kids going back to school, I think it's very important that they have breakfast, so this will be nice to have to change things up a little in the morning and I don't even have to use my brain in the trying to figure out what to feed them for breakfast.

I wanted an organized way to do my menu board, so I came up with these pockets to hold all of our menu ideas. I will sit down weekly and go through the cards and choose what we will be eating for the next week, write the ideas on the board, make my grocery list and be organized for the coming week.


I made three pockets, one for breakfast, one for lunch and one for dinner.

I then placed the pockets at the bottom of the window and glued them with my glue gun.

I wanted a place to put my dry eraser marker, so that I don't have to search for it each time I want to use it. So I glued one end of the elastic to the inside of the window, and then glued the other end of the elastic to the outside of the window. I didn't stretch the elastic at all, I wanted it to be able to stretch each time I put the dry eraser marker in.

I then put the dry eraser (actually, it's a permanent marker - because I don't have a dry eraser yet, but will be getting one about this same size) in the elastic and then glued the ribbon ends the same way I glued the elastic. I want the elastic to stretch, that's why I put the marker in to give it room, since the ribbon won't stretch.

I then glued a bow on top of the ribbon.

And there is my finished menu board.





